
YMX BOXING User Guide
Choose Your Language
Step 1
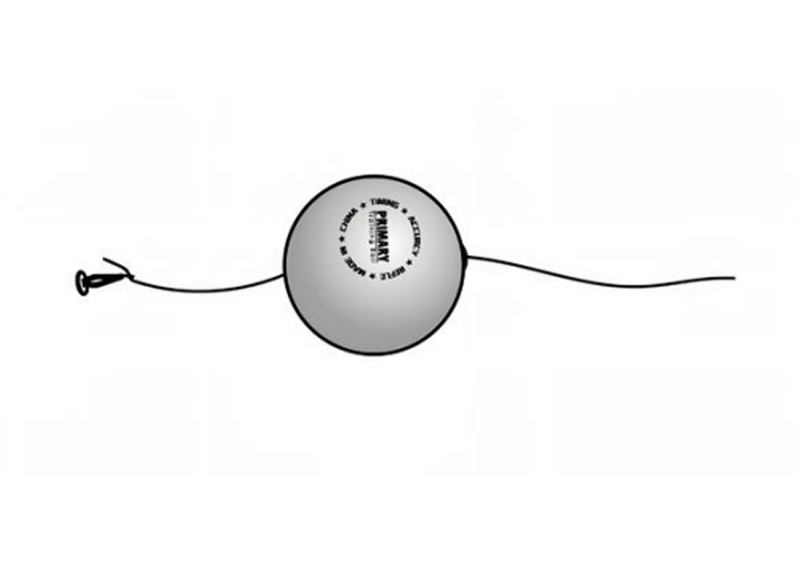
As a beginner, please start with the PRIMARY training ball. Then remove the sticker from the Ball and Elastic.
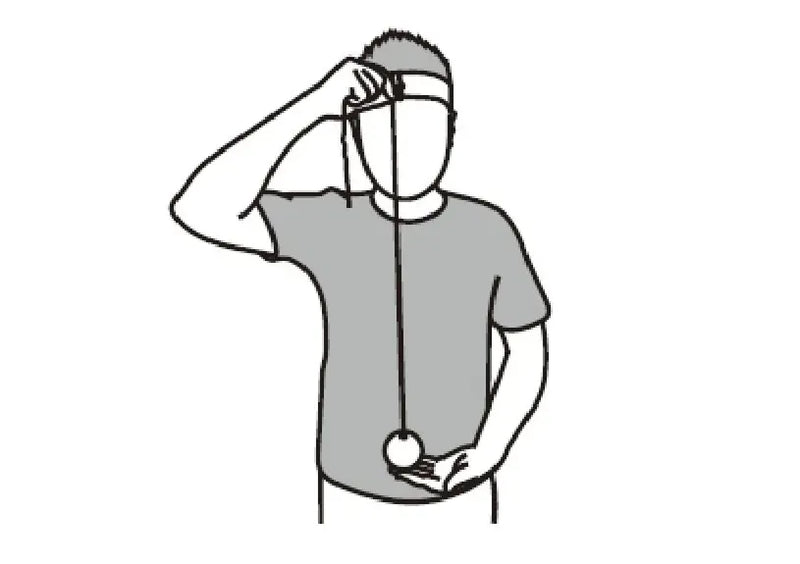
Step 2
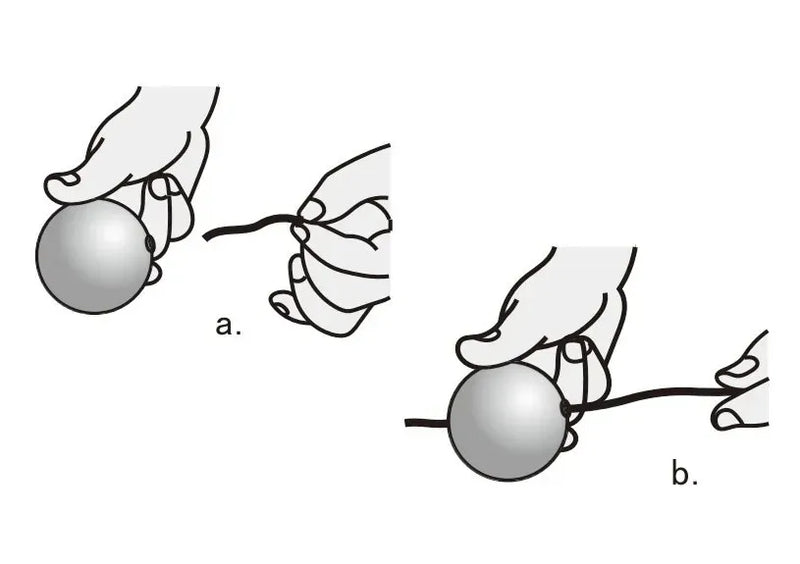
Adjust the length of the elastic so it's adaptedto your needs. A good length to start with wouldbe from your forehead to your belly button.
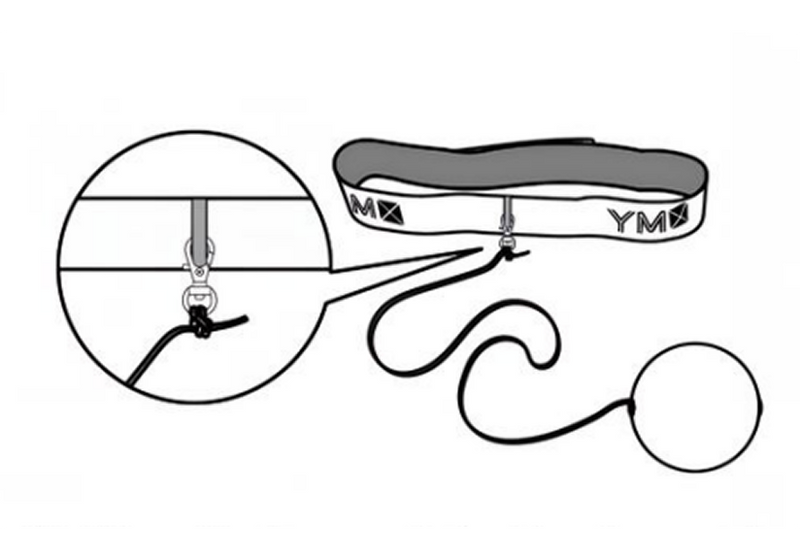
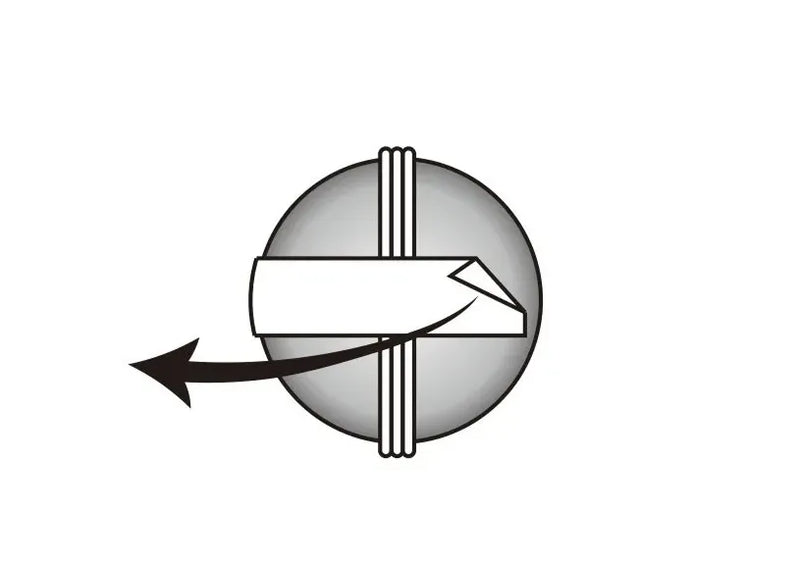
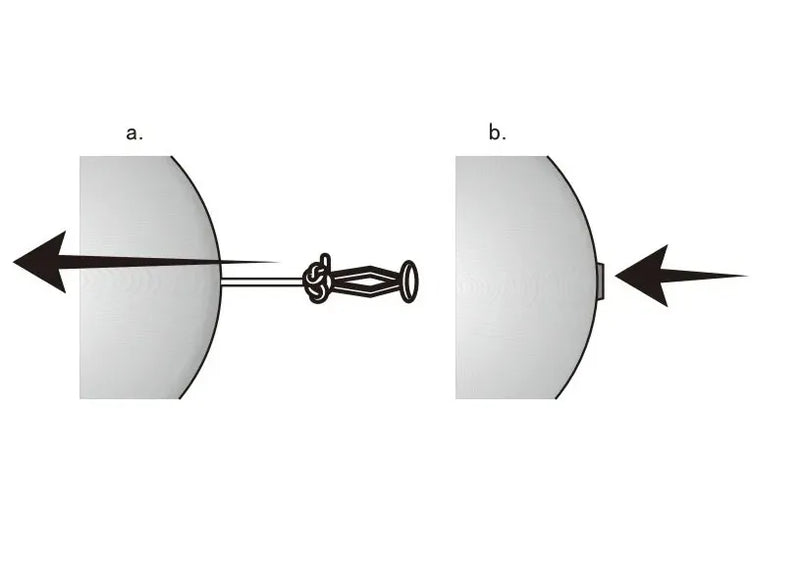
Step 3
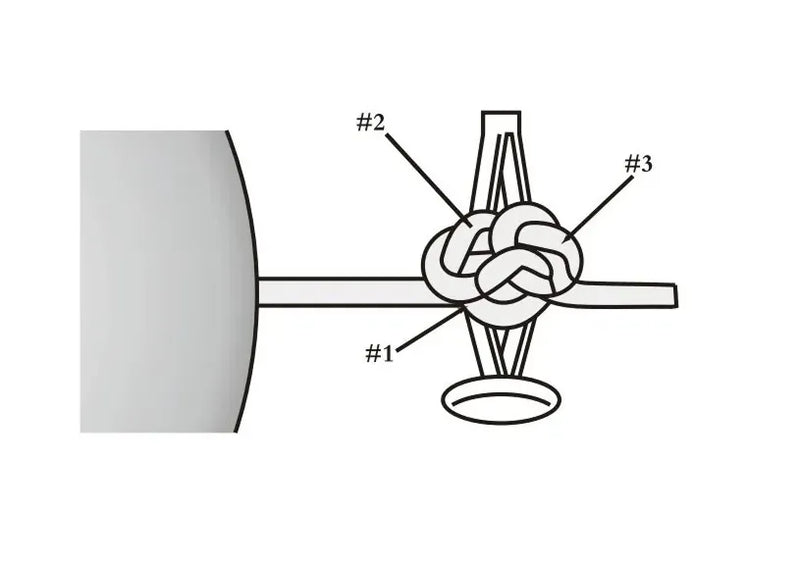
After achieving your desired length, securely triple-knot the elastic tightly around the swivel that is stitched on the headband. Then cut off the excess elastic.
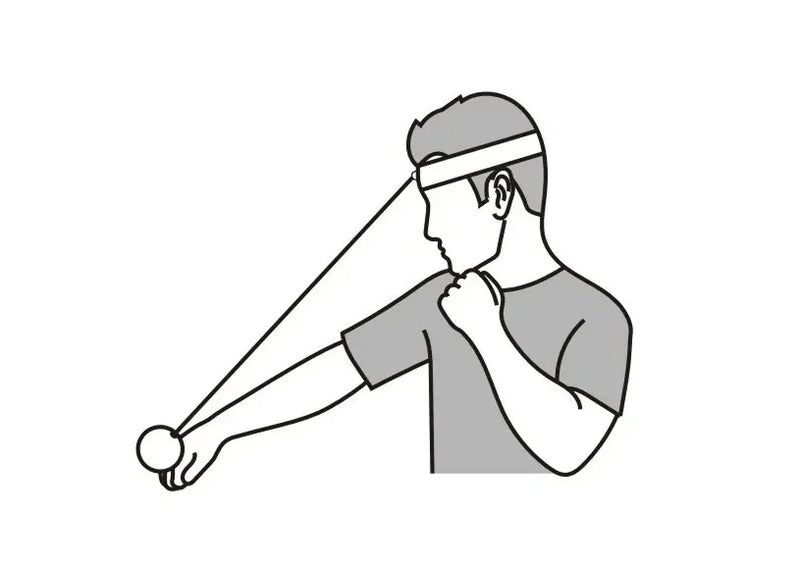
Step 4
Strap the headband on and start tapping the ball lightly. In the beginning, don't hit the ball hard. Be patient! One punch at a time until you get used to the ball movements, then as you practice more and more, you'll get used to it, and you will start to connect more punches.
Step 5
When you can hit the PRIMARY ball up to 50 times consecutively, search YMX BOXING Training Ball on YouTube to learn some more advanced tricks (such asheading, elbowing, and spin move) with the ADVANCED or PROFESSIONAL ball. Be careful! As you may notice,the PROFESSIONAL ball is heavier and firmer. Don't getKOed by it.
Step 6
How to replace the elastic? Pull out the plastic plug A at the bottom of the ball and remove the original elastic from the plug and then the ball.
Step 7
Insert the new elastic into the plastic plug B at the top of the ball and pass the elastic through the existing hole on the ball.
Step 8
Securely tighten the elastic with a triple knot around the Plug A. This is very important!
Step 9
Carefully, pull the elastic back into the ball, reinserting the Plug A firmly. Again, this is very important! You are now ready to reset your training ball according to step 2 of the User Manual.
Schritt 1
Als Anfänger sollten Sie bitte mit dem PRIMARY-Trainingsball beginnen. Entfernen Sie anschließend den Aufkleber vom Ball und vom Gummiband.
Schritt 2
Passe die Länge des Gummibands so an, dass es deinen Bedürfnissen entspricht. Eine gute Ausgangslänge wäre der Abstand von der Stirn bis zum Bauchnabel.
Schritt 3
Wenn Sie die gewünschte Länge erreicht haben, verknoten Sie das Gummiband fest dreimal um den am Stirnband angenähten Drehverschluss. Schneiden Sie anschließend das überschüssige Gummiband ab.
Schritt 4
Setz das Stirnband auf und fang an, den Ball leicht zu schlagen. Schlag den Ball am Anfang nicht zu hart. Hab Geduld! Ein Schlag nach dem anderen, bis du dich an die Bewegungen des Balls gewöhnt hast. Je mehr du übst, desto besser wirst du darin, und du wirst bald mehrere Schläge hintereinander landen können.
Schritt 5
Wenn du den PRIMARY-Ball bis zu 50 Mal hintereinander treffen kannst, suche auf YouTube nach „YMX BOXING Training Ball“, um einige fortgeschrittenere Tricks (wie Kopfstöße, Ellbogenschläge und Drehbewegungen) mit dem ADVANCED- oder PROFESSIONAL-Ball zu lernen. Sei vorsichtig! Wie du vielleicht bemerkt hast, ist der PROFESSIONAL-Ball schwerer und härter. Lass dich davon nicht k.o. schlagen.
Schritt 6
Wie wechselt man das Gummiband aus? Ziehen Sie den Kunststoffstopfen A an der Unterseite des Balls heraus und entfernen Sie das ursprüngliche Gummiband zuerst vom Stopfen und dann vom Ball.
Schritt 7
Führen Sie das neue Gummiband in den Kunststoffstopfen B an der Oberseite des Balls ein und ziehen Sie es durch die vorhandene Öffnung am Ball.
Schritt 8
Befestige das Gummiband mit einem Dreifachknoten sicher um den Plug A. Das ist sehr wichtig!
Schritt 9
Ziehen Sie das Gummiband vorsichtig wieder in den Ball zurück und setzen Sie den Plug A wieder fest ein. Auch das ist sehr wichtig! Sie können nun Ihren Trainingsball gemäß Schritt 2 der Gebrauchsanweisung zurücksetzen.
Étape 1
Si vous êtes débutant, commencez par le ballon d'entraînement PRIMARY. Retirez ensuite l'autocollant du ballon et de l'élastique.
Étape 2
Ajustez la longueur de l'élastique en fonction de vos besoins. Pour commencer, une bonne longueur correspondrait à la distance entre votre front et votre nombril.
Étape 3
Une fois que vous avez atteint la longueur souhaitée, faites un triple nœud bien serré avec l'élastique autour de l'œillet cousu sur le bandeau. Coupez ensuite l'excédent d'élastique.
Étape 4
Enfilez le casque et commencez à frapper légèrement la balle. Au début, ne frappez pas trop fort. Soyez patient ! Frappez une balle à la fois jusqu'à ce que vous vous habituiez à ses mouvements ; puis, à force de vous entraîner, vous vous y habituerez et vous commencerez à enchaîner les coups.
Étape 5
Lorsque vous parvenez à frapper la balle PRIMARY jusqu'à 50 fois d'affilée, recherchez « YMX BOXING Training Ball » sur YouTube pour découvrir des techniques plus avancées (comme les coups de tête, les coups de coude et les rotations) avec la balle ADVANCED ou PROFESSIONAL. Attention ! Comme vous le remarquerez peut-être, la balle PROFESSIONAL est plus lourde et plus dure. Ne vous faites pas mettre K.O. par elle.
Étape 6
Comment remplacer l'élastique ? Retirez le bouchon en plastique A situé au bas de la balle, puis retirez l'élastique d'origine du bouchon et de la balle.
Étape 7
Insérez le nouvel élastique dans le bouchon en plastique B situé en haut de la balle, puis faites passer l'élastique à travers le trou déjà présent sur la balle.
Étape 8
Serrez bien l'élastique en faisant un triple nœud autour du Plug A. C'est très important !
Étape 9
Tirez délicatement l'élastique vers l'intérieur de la balle, puis réinsérez fermement le bouchon A. Encore une fois, c'est très important ! Vous êtes maintenant prêt(e) à réinitialiser votre balle d'entraînement conformément à l'étape 2 du mode d'emploi.
Passo 1
Se sei un principiante, ti consigliamo di iniziare con la palla da allenamento PRIMARY. Quindi rimuovi l'adesivo dalla palla e dall'elastico.
Passo 2
Regola la lunghezza dell'elastico in modo che si adatti alle tue esigenze. Una buona lunghezza iniziale va dalla fronte all'ombelico.
Passo 3
Una volta raggiunta la lunghezza desiderata, fai un triplo nodo ben stretto con l'elastico attorno al girevole cucito sull'archetto. Quindi taglia via l'elastico in eccesso.
Passo 4
Indossa la fascia e inizia a colpire leggermente la palla. All'inizio, non colpire la palla con troppa forza. Sii paziente! Un colpo alla volta finché non ti abitui ai movimenti della palla; poi, man mano che ti alleni sempre di più, ci prenderai la mano e inizierai a mettere a segno più colpi.
Passo 5
Quando riesci a colpire la palla PRIMARY fino a 50 volte di fila, cerca “YMX BOXING Training Ball” su YouTube per imparare alcune tecniche più avanzate (come i colpi di testa, di gomito e le rotazioni) con la palla ADVANCED o PROFESSIONAL. Fai attenzione! Come avrai notato, la palla PROFESSIONAL è più pesante e più dura. Non farti mettere KO da essa.
Passo 6
Come sostituire l'elastico? Estrarre il tappo di plastica A situato nella parte inferiore della pallina e rimuovere l'elastico originale dal tappo e poi dalla pallina.
Passo 7
Inserire il nuovo elastico nel tappo di plastica B nella parte superiore della palla e farlo passare attraverso il foro già presente sulla palla.
Passo 8
Fissare saldamente l'elastico con un triplo nodo attorno al Plug A. Questo è molto importante!
Passo 9
IT: Con attenzione, ritira l'elastico all'interno della palla, reinserendo saldamente il tappo A. Anche in questo caso, è molto importante! Ora sei pronto per ripristinare la tua palla da allenamento seguendo il punto 2 del manuale d'uso.
Paso 1
Si eres principiante, empieza con la pelota de entrenamiento PRIMARY. A continuación, retira la pegatina de la pelota y de la banda elástica.
Paso 2
Ajusta la longitud del elástico para que se adapte a tus necesidades. Una buena medida para empezar sería desde la frente hasta el ombligo.
Paso 3
Cuando hayas alcanzado la longitud deseada, haz un nudo triple bien apretado con el elástico alrededor del pivote cosido a la diadema. A continuación, corta el exceso de elástico.
Paso 4
Ponte la diadema y empieza a golpear la pelota suavemente. Al principio, no le des con fuerza. ¡Ten paciencia! Un golpe cada vez hasta que te acostumbres a los movimientos de la pelota; luego, a medida que practiques más y más, te irás acostumbrando y empezarás a encadenar más golpes.
Paso 5
Cuando consigas golpear la pelota PRIMARY hasta 50 veces seguidas, busca «YMX BOXING Training Ball» en YouTube para aprender algunos trucos más avanzados (como cabezazos, codazos y giros) con la pelota ADVANCED o PROFESSIONAL. ¡Ten cuidado! Como habrás notado, la pelota PROFESSIONAL es más pesada y dura. No dejes que te noquee.
Paso 6
¿Cómo se cambia el elástico? Saca el tapón de plástico A de la parte inferior de la pelota y retira el elástico original del tapón y, a continuación, de la pelota.
Paso 7
Introduce el nuevo elástico en el tapón de plástico B situado en la parte superior de la pelota y pásalo por el orificio que ya tiene la pelota.
Paso 8
Ata bien el elástico con un nudo triple alrededor del tapón A. ¡Esto es muy importante!
Paso 9
Con cuidado, vuelve a introducir el elástico en la pelota y vuelve a colocar el tapón A firmemente. ¡Esto es muy importante! Ya estás lista para reiniciar tu pelota de entrenamiento siguiendo el paso 2 del manual de usuario.
ステップ 1
初心者の方は、まず「PRIMARY」トレーニングボールから始めてください。その後、ボールとゴムバンドのステッカーを剥がしてください。
ステップ 2
ゴムバンドの長さを、ご自身の体形に合わせて調整してください。目安として、額からへそまでの長さが適しています。
ステップ 3
希望の長さになったら、ヘッドバンドに縫い付けられているスイベルの周りにゴムをしっかりと巻き付け、三重結びにします。その後、余分なゴムを切り取ってください。
ステップ 4
ヘッドバンドを装着し、ボールを軽く叩き始めましょう。最初は強く打たないでください。焦らず、じっくりと!ボールの動きに慣れるまでは、一度に一発ずつ打つようにしましょう。練習を重ねるにつれて慣れてくるので、次第に連続して打てるようになります。
ステップ 5
PRIMARYボールで最大50回連続ヒットができるようになったら、YouTubeで「YMX BOXING Training Ball」を検索し、ADVANCEDまたはPROFESSIONALボールを使ったより高度なテクニック(ヘディング、エルボー、スピンムーブなど)を学んでみてください。ただし、ご注意ください!お気づきかもしれませんが、PROFESSIONALボールはより重く、硬くなっています。ボールにKOされないよう気をつけてください。
ステップ 6
ゴムバンドの交換方法は?ボールの底にあるプラスチック製のプラグAを引き抜き、プラグから元のゴムバンドを取り外し、続いてボールからも取り外してください。
ステップ 7
新しいゴムバンドをボール上部のプラスチック製プラグBに差し込み、ボールにある既存の穴に通します。
ステップ 8
プラグAの周りにゴムバンドを巻き、三重結びでしっかりと締めてください。これは非常に重要です!
ステップ 9
慎重にゴムバンドをボールの中に引き戻し、プラグAをしっかりと差し込み直してください。これも非常に重要です!これで、取扱説明書のステップ2に従ってトレーニングボールをリセットする準備が整いました。
الخطوة 1
بصفتك مبتدئًا، يرجى البدء باستخدام كرة التدريب ”PRIMARY“. ثم قم بإزالة الملصق من الكرة والشريط المطاطي.
الخطوة 2
اضبط طول الشريط المطاطي بحيث يتناسب مع احتياجاتك. الطول المناسب للبدء به هو من جبهتك إلى سرتك.
الخطوة 3
بعد الوصول إلى الطول المطلوب، اربط الشريط المطاطي بثلاث عقدات محكمة حول الحلقة الدوارة المُخيطة على عصابة الرأس. ثم اقطع الجزء الزائد من الشريط المطاطي.
الخطوة 4
اربط عصابة الرأس وابدأ بضرب الكرة برفق. في البداية، لا تضرب الكرة بقوة. تحلى بالصبر! اضرب الكرة مرة واحدة في كل مرة حتى تعتاد على حركاتها، ثم مع تزايد ممارستك، ستعتاد على ذلك وستبدأ في تسلسل الضربات.
الخطوة 5
عندما تتمكن من ضرب الكرة ”PRIMARY“ حتى 50 مرة متتالية، ابحث عن ”YMX BOXING Training Ball“ على يوتيوب لتتعلم بعض الحركات الأكثر تقدمًا (مثل الضرب بالرأس، والضرب بالمرفق، وحركة الدوران) باستخدام الكرة ”ADVANCED“ أو ’PROFESSIONAL‘. كن حذرًا! كما قد تلاحظ، فإن الكرة ”PROFESSIONAL“ أثقل وأكثر صلابة. لا تدعها توقعك أرضًا.
الخطوة 6
الخطوة 7
أدخل الشريط المطاطي الجديد في السدادة البلاستيكية (B) الموجودة في الجزء العلوي من الكرة، ثم مرر الشريط المطاطي عبر الفتحة الموجودة في الكرة.
الخطوة 8
اربط الشريط المطاطي بإحكام بعقدة ثلاثية حول المكون A. هذا أمر بالغ الأهمية!
الخطوة 9
اسحب الشريط المطاطي بحذر إلى داخل الكرة، ثم أعد إدخال السدادة «A» بإحكام. مرة أخرى، هذا أمر بالغ الأهمية! أنت الآن جاهز لإعادة ضبط كرة التدريب وفقًا للخطوة 2 من دليل المستخدم.